Pages
▼
Thursday, March 29, 2012
Paper Smooches Blog Hop!
Paper Smooches (one of my favorite stamp companies) is having a blog hop to debut some of their new stamp sets! You should stop by and follow along...you might win free stamps, and who doesn't LOVE that!?!?!? Click HERE to join the fun!
Tuesday, March 27, 2012
Cooking with Cricut: April Fools Day Challenge
Today's challenge over at Cooking with Cricut is about April Fools! Use your Cricut to make a FUNNY or PUNNY project. I made this punny card with the Just Because Cards Cartridge and put a little twist (pun intended) on a love card.
Supplies used: Cricut Cartridge: Just Because Cards; Patterned Papers: Little Yellow Bicycle; Cardstock: Bazill; Border sticker: Crate Paper; Letter Stickers: Adornit; Twine: Devine Twine; Ribbon: Bo Bunny; Misc: Button.
I hope you can stop by Cooking With Cricut and play along! I'd love to see your ideas!
Thanks for looking! I appreciate your kind comments!
~Becky
Echo Park Sketch Challenge
Echo Park is so kind as to provide its customers with free downloadable idea books. In the latest idea book for the This&That lines they are running a sketch challenge. I LOOOVE Echo Park and just got both of the new This&That kits for Charming and Graceful, so I was excited to play along.
Here's the sketch...
And here is my interpretation. I have been wanting to scrapbook this picture of Livi for awhile and it fit perfectly into this challenge.
Here's the sketch...
And here is my interpretation. I have been wanting to scrapbook this picture of Livi for awhile and it fit perfectly into this challenge.
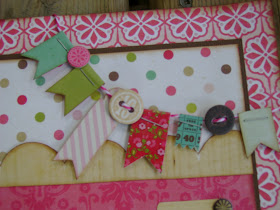
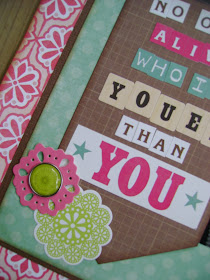
And here are some close-ups of the details...
Supplies used: Everything: Echo Park except...Twine: The Twinery, bling (misc)
Thanks for looking! I love to read your kind comments!
~Becky
Friday, March 16, 2012
My Paper Smooches Win!
A couple of weeks ago I was the random winner in the Sparks Challenge at Paper Smooches!!! I got to choose a free stamp set and I immediately chose one of their newest sets called Little Fella. Isn't it adorable!!! I HAD to have it! I love that I get to make some BOY cards for once!
I couldn't wait to use this set when it finally arrived in my mailbox. Anyways, I just wanted to share with you the first card I made from my new stamp set! The "Happy Birthday" sentiment came from the Party Posse set, but the word "Dude" is from Little Fella.
Supplies used: Stamps: Paper Smooches; Patterned Papers: Kaisercraft, Studio Calico; Cardstock: Bazzill, Xpress-it; Stamping Ink: Memento Tuxedo Black, Stampin Up, Pallet Hybrid; Distress Ink: Ranger/Tim Holtz; Eyelets: Making Memories; Markers: Copics B0000, B000, B02, C1, C3, C5, YG91.
My absolute FAVORITE little fella in this set is the robot! He is precious. I used my new American Crafts papers from the CHAP line on this card and they worked perfectly! I added some red Stickles to accentuate the little heart on the robot's chest.
Supplies used: Stamps: Paper Smooches; Patterned papers: American Crafts; Letter Stickers: American Crafts; Stamping Ink: Memento Tuxedo Black; Markers: Copics T1, T3, T5 and Black Sharpie; Twine: The Twinery; misc: staples, red Stickles.
Thanks for looking! I love to read your comments :)
~Becky
Wednesday, March 14, 2012
Paper Smooches Sparks Challenge
This month's Sparks Challenge over at Paper Smooches runs from March 8th to 21st. The photo we are to use for inspiration is this...
I made two cards inspired by some aspect of this lovely felt flower wreath.
With the first card, I took inspiration from the colors, the felt, the and the flowers. I used a Kraft cardstock base like in the inspiration image. The large white circle is felt that I cut out using my Spellbinders Nestabilities. I did a very soft pink coloring on the kitty to stick with the pale feel of the inspiration image and added a few embellies to tie it all together. The sentiment is from the Word Salad set, and the Kitty is from the Party Posse set.
I added a few tiny bits of bling to the little kitty's collar to glam her up a bit. I thought it looked pretty cute.
Supplies used: Stamps: Paper Smooches; Cardstock: Bazzill, Xpress-It white; Markers: Copics RV0000, RV21, B000, B02; Stamping Ink: Memento Tuxedo Black; Distress Ink: Ranger/Tim Holtz; Roses: Prima; Yellow fabric flower: Dollarama; Felt: Dollar Store; Die Cuts: Spellbinders Nestabilities; Rhinestones: Kaisercraft; Ribbon: Renaissance by Design; misc: buttons, embroidery floss
My next card took me out of my comfort zone a bit. I don't normally make such a plain card, but I always like it when others do it so I thought I would give it a try.
Supplies used: Stamps: Paper Smooches; Cardstock: Bazzill; Ink: Stampin' Up, Memento; Twine: Devine Twine, Corner rounder punch: EK Success; misc: buttons.
This card is made with the My Guy set. I saw this fun way to attach buttons on a card I pinned on Pinterest and this is the first chance I've had to try it out. I really like it and I'm sure you'll see me using this one again!
I am really missing my camera and I hope it comes home to me all fixed and ready to "snap" really soon, cause I'm just NOT lovin these pictures my old point and shoot takes!
Thanks for looking!
~Becky
Tuesday, March 13, 2012
Cooking with Cricut: St. Patty's Day Challenge
Ugh! I have been so sick this week! I haven't got a thing done! Luckily for me, I acutally broke my normal pattern of procrastination and had this weeks challenge assignment done a few weeks ago!
This week's challenge over at CWC is to create a project that is St. Patrick's Day or Rainbow themed. I'm not really much for making St. Patty's Day projects, but who doesn't love a rainbow?!?
Here is what I've come up with. The card is 4 1/4 x 5 1/2. The rainbow and clouds are from the Once Upon a Princess cartridge and are cut at 3". I cut the little cloud that the sentiment is stamped on free hand. The stamped sentiment is from a clear acrylic Inkadinkado stamp set called Friendly Advice. I used Stickles to add some fun to the clouds and googly eyes as well. The rainbow and clouds are popped up on some foam dimensional adhesive to add some depth.
Supplies used: Patterned papers: My Minds Eye, Kaisercraft, sei, Chatterbox, Scenic Route; Cardstock: American Crafts; Scallop Edge Punch: EK Success; Glitter: Stickles, Stamps: Inkadinkado; Ink: Versafine; misc: googly eyes, brads, black marker.
Now I must apologize for the the terrible photo quality. My good camera has gone off to the camera hospital for repairs and I am left using my old point and shoot camera and praying for some nice natural light. Unfortunately it has been pretty gloomy around here and so this is the best quality I could get with some help from FotoFlexer ;)
I hope what you have seen here has inspired you to make something of your own to suit this theme. Please add your work to this weeks design challenge on the CWC blog!
~Becky
This week's challenge over at CWC is to create a project that is St. Patrick's Day or Rainbow themed. I'm not really much for making St. Patty's Day projects, but who doesn't love a rainbow?!?
Here is what I've come up with. The card is 4 1/4 x 5 1/2. The rainbow and clouds are from the Once Upon a Princess cartridge and are cut at 3". I cut the little cloud that the sentiment is stamped on free hand. The stamped sentiment is from a clear acrylic Inkadinkado stamp set called Friendly Advice. I used Stickles to add some fun to the clouds and googly eyes as well. The rainbow and clouds are popped up on some foam dimensional adhesive to add some depth.
Now I must apologize for the the terrible photo quality. My good camera has gone off to the camera hospital for repairs and I am left using my old point and shoot camera and praying for some nice natural light. Unfortunately it has been pretty gloomy around here and so this is the best quality I could get with some help from FotoFlexer ;)
I hope what you have seen here has inspired you to make something of your own to suit this theme. Please add your work to this weeks design challenge on the CWC blog!
~Becky
Tuesday, March 6, 2012
Cooking with Cricut: Dr. Seuss Challenge
Today is my very first blog post as a new member of the Cooking with Cricut Design team!!!
Our first assignment was to participate in the Dr. Seuss Challenge! I really had a lot of fun playing around with this one, and I have created a little show and share to explain how I used my Cricut and Cricut Craft Room to put this layout together.
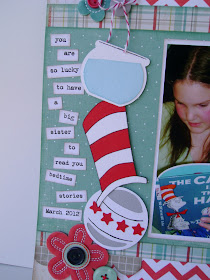
First, my layout...
Supplies used: Cricut Cartridges: Birthday Bash, George and Basic Shapes, B is for Boy, Paper Doll Dress Up, Robots, Graphically Speaking; Patterned Papers: My Minds Eye, Crate Paper, Sassafrass; Cardstock: Bazzill; Flower Embellishments: Basic Grey; Twine: Divine Twine; Brad: Stampin Up; Journaling font: Vintage Typewriter; Ink: Tim Holtz Distress Ink; Misc: embroidery floss, buttons.
To create the hat, I used Cricut Craft Room.
First off, I used the little top hat from Paper Doll Dress Up
I then used the tools to stretch the hat vertically.
Then I used the corner tool to angle the hat.
Finally, I simply cut out the whole hat in both white and red. I used the white hat for the base and cut the red hat into strips by hand and glued every second red strip on to the white hat. I added black marker details to finish it off!
To create the "Read to Me" title for the page I combined a few different cartridges in Cricut Craft Room.
To begin with I used the tag from Birthday Bash.
To make the tag look more like a ticket, I made tiny little circles with George and Basic Shapes and lined them up along the side of the tag so that it would make little half circle cutouts.
I used the word [read] from Graphically Speaking and the words "to me" are from the font on the Robotz cartridge.
I moved the words around until they were close enough to weld them and then cut it all out.
To create the ball I used B is for Boy. Normally the ball comes with an elephant on top of it but I used CCR to get the ball to the size I wanted, and then just cut the elephant off the top by hand after I had used the Cricut to cut out my shape.
To make the fish bowl, I again used B is for Boy. Normally when you cut out the water it fills up the whole bowl, I simply cut the water level by hand to make it look like it was tipped.
To finish off my layout I added some flower embellishments and did some topsy turvy journaling down the side.
I just wanted to show a close up of the background paper. It has little letters all over it and I thought it was a great little detail and went great with the challenge
I hope this helps you if you decide you would like to try to recreate some or all of the elements on this page.
I'd love to see your Dr. Seuss inspired projects too! Link up your projects on the Cooking with Cricut website.
I'm looking forward to sharing more of my creations with you at Cooking with Cricut!
~Becky
Friday, March 2, 2012
Leibster Award
In the past week, much to my surprise, I have been given a “Liebster Blog Award” by three different ladies! Wow! I am so excited!
What is a Liebster Blog Award you ask? Here are the details…
The origins of the Liebster Blog Award are unclear but "the word translates from German as "darling" or "beloved". It's given to bloggers who have less than 200 followers in order to generate some traffic for them.
Here are the guidelines for the Liebster Blog Award
1. Acknowledge the blogger who gave you the award by linking back to them.
2.Give this award to 5 other bloggers, who must have less than 200 followers, and let them know through a comment on their blog.
3. Post the award on your blog
4. Best of all- bask in the glory, have fun, and share the love!
2.Give this award to 5 other bloggers, who must have less than 200 followers, and let them know through a comment on their blog.
3. Post the award on your blog
4. Best of all- bask in the glory, have fun, and share the love!
So, first I would like to thank Joy at Blondemommy, Shilo at Paper Meets Glue, and Jill at Jaihart Just Lovely Designs who gave me the award. THANKS LADIES!!!
Second, I would like to give this wonderful award to some fellow bloggers…
My Life in Pages: I have known Sylvie for quite a few years now. She is an amazingly talented scrapbooker and I have always admired her style, and have even scrap lifted some layouts. She is a featured scrapbooker in the Spring issue of Canadian Scrapbooker Magazine, out right now!
Do What You Love: Christa is another talented Canadian Scrapbooker. I came across her blog and was immediately inspired by what I saw. Please stop by and say hi to her.
Something Good: When I found Katja's blog, I spent awhile just watching her photo album of her layouts scroll by at the top of her page. I love them all!
The Papered Cottage: Shellye, has a beautiful blog. I found her through the Unity Stamp blog. She has an awesome style and you can check out all the cool things she makes, from pages, to cards, to mini albums and paper projects. She was just given a position on the Simple Stories design team! I'm so jealous! I applied too but was not chosen :( Congrats to Shellye!
Thanks to you ladies for being so inspiring!


