Pages

Showing posts with label George and Basic Shapes. Show all posts

Wednesday, July 18, 2012

CWC: Brads and Buttons challenge

This week's challenge at Cooking with Cricut is to use buttons or brads on your project. I used some simple shapes and added the buttons and brads to embellish my circles. The cream circles are cut from George and Basic Shapes, and the patterned circles are actually scalloped (I'm not sure you can tell with the scallops being so tiny) and are cut from Mini Monograms.

Supplies used: patterned paper: MME; cardstock: American Crafts; sentiment stamp: Unity Stamp Co.; brads: MME; scalloped edge punch: EK Success/SU; buttons: misc.

I hope you'll stop by Cooking with Cricut and see what the rest of the DT has cooked up! And please join us and link up your creations using buttons and brads!

Thanks for stopping by today,
reading your kind comments makes my day,
~Becky

Friday, May 25, 2012

CWC Blog-Aversary Blog Hop: Day 6

Welcome to Paper Crafting World and Cooking With Cricut's 2nd Blog-Aversary and our week long celebration! Each day for a whole week (May 19-26) we will be bringing you fabulous projects made by our Design Team members. We have some GREAT blog candy as well as some daily file and graphic give-aways -- so you will definitely want to make PCW-CWC your daily stop every day this week!

Our theme for Saurday (the final day of the hop) is...
And here is what I created! I have been making a lot of pretty girly cards recently so I wanted to make a masculine card this time.
Supplies used: Patterned Papers: Ki Memories; Cardstock: Bazzill; Twine: The Twinery; Star Pin: Little Yellow Bicycle; Stamps: {ippity} by Unity Stamp Co.; Misc: Button
The papers I used for this card are actually from my Halloween stash, but I love the lime green and I thought that these colors would be perfect for a masculine card. I am totally into using the negative space left over from my die cuts these days and I have done it again here.
The stars are cut from Craft Room Basics, the tag is from George and Basic Shapes and the Scalloped edge is from Just Because Cards
Here is a quick screen capture of how I cut out the stars on Cricut Craftroom. I made a rectangle the size I wanted it to be and then layered my stars on top and turned and sized them until I was happy with how they fit. Then I cut that whole bit out at once. I kept the stars to use on another project. Also in this screen shot are the tag and the border I used so you can see what they look like in CCR.

The star pin that I had was yellow and that just didn't go with the colors on my card so I used a Copic marker to color the star...it worked perfectly!

I used this {ippity} stamps set by Unity Stamp Co. for the sentiment on the card. This set is called How YOU Doin'
Thanks for stopping by and make sure you head on over to Cooking With Cricut to check out the rest of the projects by our amazing Design Teams!

I love to read your kind comments!
~Becky

Tuesday, April 24, 2012

My Minds Eye Hexagon Challenge

Hexagons are the biggest trend right now. I haven't had the opportunity to create anything with them yet so when I saw that My Minds Eye had a challenge to use hexagons this month I thought I'd give it a try.

Another big trend I see going on right now is to use the negative space left over when you make cuts on an electronic die cut machine. I have been wanting to try this as well, so I combined the two ideas into my challenge entry.

I didn't come up with this layout entirely on my own. I used a layout by Piradee Talvanna HERE as inspiration.

So with out further ado, here is my layout...


Here are some of the close up details...I added these chipboard bees from My Minds Eye's Alphabet Soup line....The word "happy" was cut from the Lyrical Letters cartridge on my Cricut.

I used a number of My Minds Eye paper lines to get the yellow's blues, and blacks and whites to fill in the hexagon shapes: Andrea Victoria, Miss Caroline Fiddlesticks & Dolled Up, Lost & Found 2 Sunshine, On the Bright Side, and Lime Twist Happy Go Lucky.

The fun brads from the My Minds Eye Lost & Found 2 line Sunshine worked great to add some finishing touches. You can see in this close up the dimension that is created by lifting up the hexagon diecut paper.

The die cut banner and brads and lable came from My Minds Eye as well. The little yellow word stickers are from Cosmo Cricket.


For those of you who might be unsure about how to use the negative space on your electronice die cut machines I thought I would show you how I created this layout.  I used my Cricut machine and Cricut Craftroom online so that I could get my hexigons exactly how I wanted them.  Here is a screen capture of what I did in CCR.

I made an 8x8 inch square for my first layer using the George and Basic Shapes cartridge. For the second layer I added the hexigon shape at 1.5" from Once Upon a Princess. I copied and pasted the shape multiple times and layed the shapes out evenly over the square below. I sent it to cut on my Cricut and made sure to set it to cut all of the layers at the same time.

Here is what my paper looked like once I cut it out.
I added the different patterned papers to the back of this piece and used dimensional adhesives to pop it all up on top of a 10x10" piece of white cardstock and then mounted the whole thing on to the yellow chevron paper. Finally I added the title, photo and embellishments.

I hope you like what you see and maybe learned a little something here today.

It makes my day to read your kind comments

Thanks for stopping by!
~Becky

Saturday, April 21, 2012

CWC Home Decor Blog Hop Day 1!!

Welcome to Paper Crafting World and Cooking With Cricut’s Home Décor Blog Hop! Our Design Teams are so excited to bring you a two-day hop that focuses on projects for your home – that’s right no cards or scrapbook layouts in this hop!

You should have arrived here from visiting Michelle at Michelle's Crafty Creations.

If you’ve joined us in mid-Hop and would like to check out all the other fantastic projects head on over Melinda’s Paper Crafting World and start at the beginning.

Hi everyone, thanks so much for stopping by, Becky here with a sweet banner for a little boy's room.  I was given this photo of little Zakk's bedding and asked to make a name banner to coordinate.  This bedroom set is just so sweet, I immediately loved the colors and the precious animals and I had a great time making something special to go in his room.

I used Birthday Bash to create the arrow shaped flags on the banner and cut them at 6". The circles were cut from George and Basic Shapes at 3.25". The font comes from Birthday Bash and was cut at 2.25". All of the animals were cut at various sizes from Create a Critter, except the Elephant who came from Birthday Bash.

I strung the flags onto some 1 inch ribbon and embellished with some buttons. I gave all the critters googly eyes and I think they look super cute! To finish it off I added some little bits of ribbon between each of the flags to add a little whimsy!


Thanks for coming by :) I hope you will come by again tomorrow to see another project that I've got to share with you!

I enjoy reading your kind comments :)
~Becky

We hope you’ll link up your Home Décor project for a chance at winning one of our giveaways. One winner will be chosen by random draw and three others will be selected by the Design Team. Head on over to Cooking With Cricut for the guidelines and the link up.

Thanks for stopping by! Head on over and check out what Jen at Musings of a Crafty Mom has cooked up!

Tuesday, March 6, 2012

Cooking with Cricut: Dr. Seuss Challenge


Today is my very first blog post as a new member of the Cooking with Cricut Design team!!!

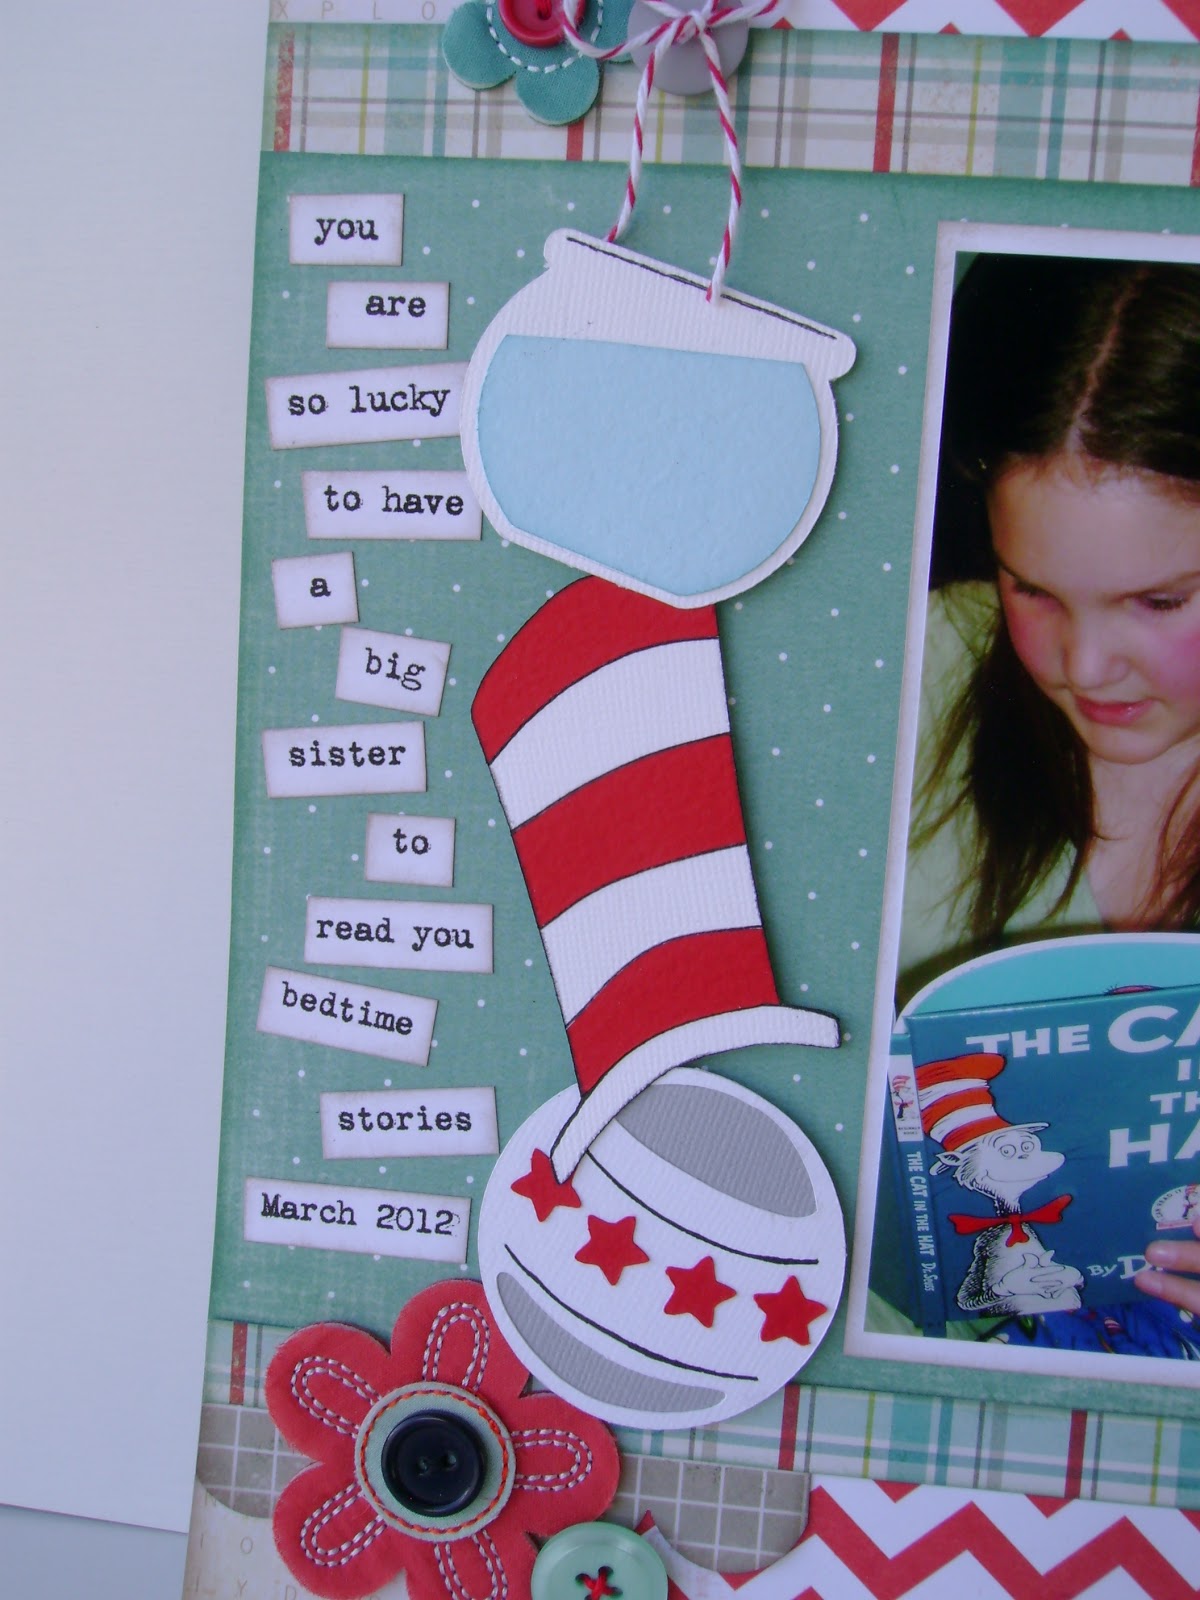
Our first assignment was to participate in the Dr. Seuss Challenge! I really had a lot of fun playing around with this one, and I have created a little show and share to explain how I used my Cricut and Cricut Craft Room to put this layout together.

First, my layout...
Supplies used: Cricut Cartridges: Birthday Bash, George and Basic Shapes, B is for Boy, Paper Doll Dress Up, Robots, Graphically Speaking; Patterned Papers: My Minds Eye, Crate Paper, Sassafrass; Cardstock: Bazzill; Flower Embellishments: Basic Grey; Twine: Divine Twine; Brad: Stampin Up; Journaling font: Vintage Typewriter; Ink: Tim Holtz Distress Ink;  Misc: embroidery floss, buttons.

To create the hat, I used Cricut Craft Room.
First off, I used the little top hat from Paper Doll Dress Up
I then used the tools to stretch the hat vertically.
Then I used the corner tool to angle the hat.
Finally, I simply cut out the whole hat in both white and red. I used the white hat for the base and cut the red hat into strips by hand and glued every second red strip on to the white hat. I added black marker details to finish it off!


To create the "Read to Me" title for the page I combined a few different cartridges in Cricut Craft Room.

To begin with I used the tag from Birthday Bash.
To make the tag look more like a ticket, I made tiny little circles with George and Basic Shapes and lined them up along the side of the tag so that it would make little half circle cutouts.

I used the word [read] from Graphically Speaking and the words "to me" are from the font on the Robotz cartridge.

I moved the words around until they were close enough to weld them and then cut it all out.

To create the ball I used B is for Boy. Normally the ball comes with an elephant on top of it but I used CCR to get the ball to the size I wanted, and then just cut the elephant off the top by hand after I had used the Cricut to cut out my shape.

To make the fish bowl, I again used B is for Boy. Normally when you cut out the water it fills up the whole bowl, I simply cut the water level by hand to make it look like it was tipped.

To finish off my layout I added some flower embellishments and did some topsy turvy journaling down the side.

 I just wanted to show a close up of the background paper. It has little letters all over it and I thought it was a great little detail and went great with the challenge

I hope this helps you if you decide you would like to try to recreate some or all of the elements on this page.

I'd love to see your Dr. Seuss inspired projects too! Link up your projects on the Cooking with Cricut website.

I'm looking forward to sharing more of my creations with you at Cooking with Cricut!

~Becky