Today is my very first blog post as a new member of the
Cooking with Cricut Design team!!!
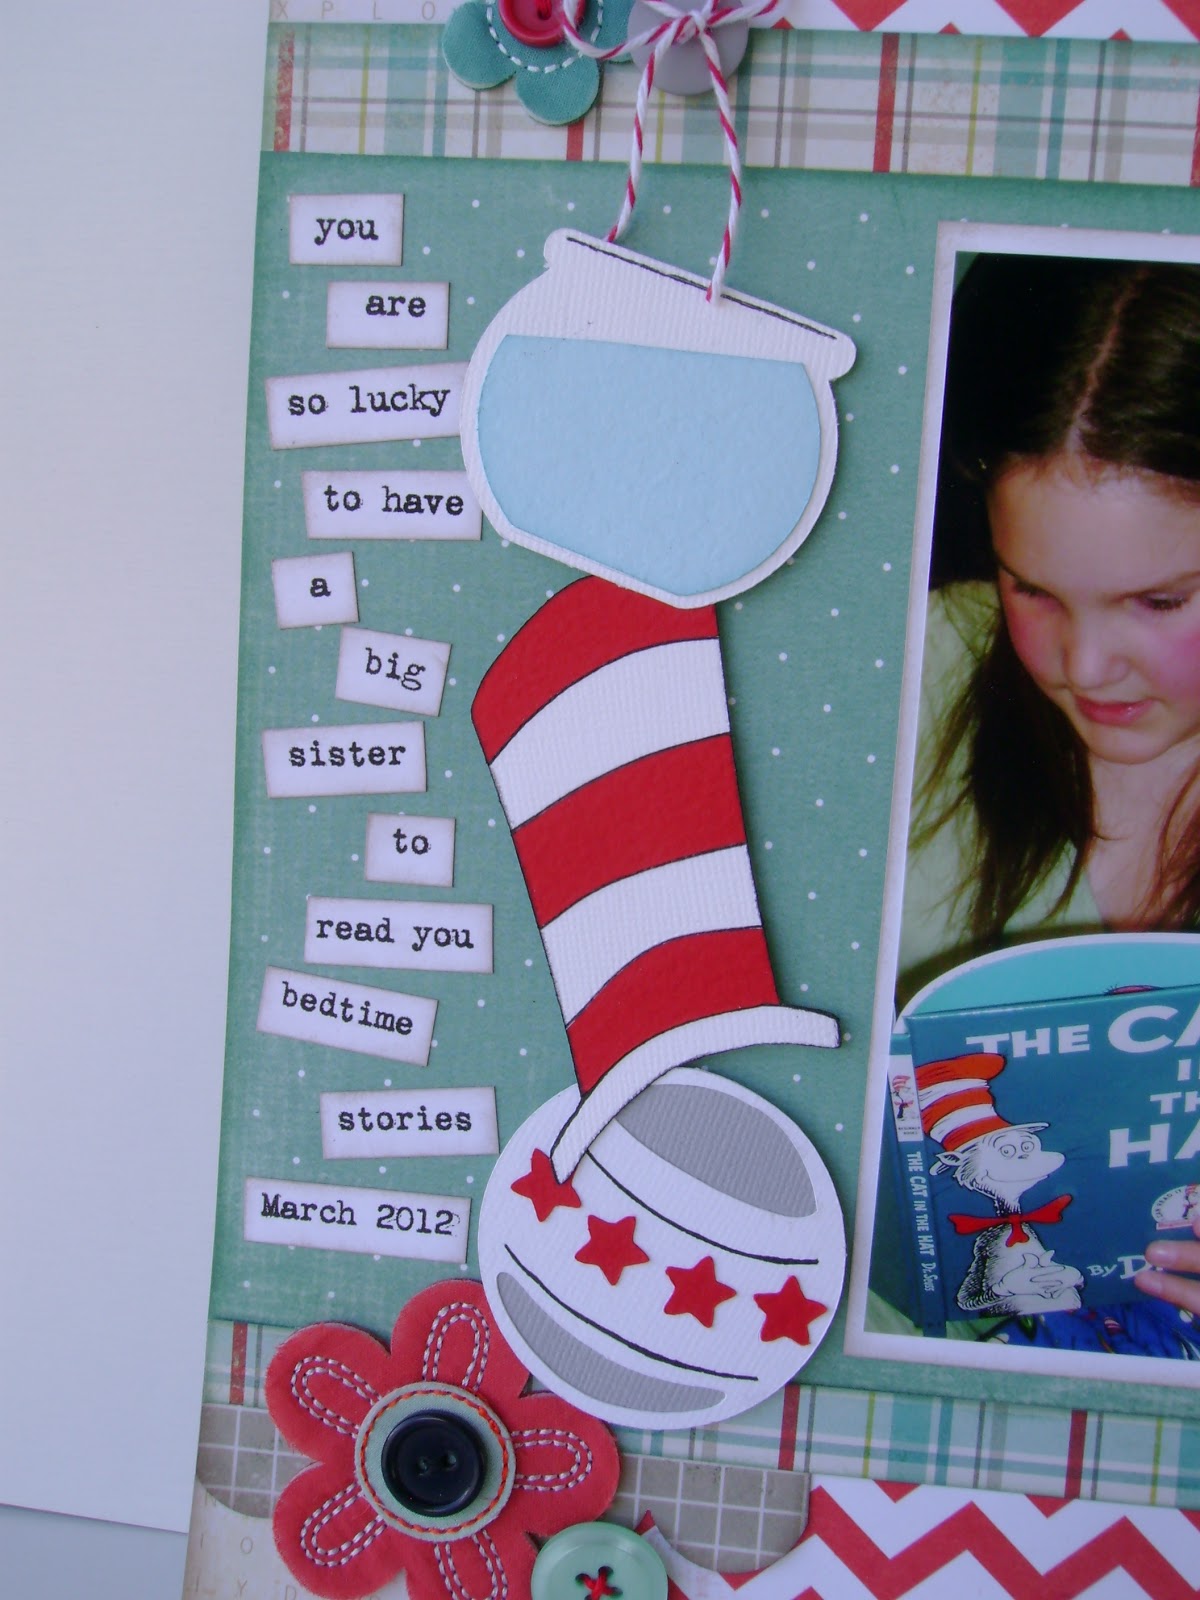
Our first assignment was to participate in the Dr. Seuss Challenge! I really had a lot of fun playing around with this one, and I have created a little show and share to explain how I used my Cricut and Cricut Craft Room to put this layout together.
First, my layout...
Supplies used: Cricut Cartridges: Birthday Bash, George and Basic Shapes, B is for Boy, Paper Doll Dress Up, Robots, Graphically Speaking; Patterned Papers: My Minds Eye, Crate Paper, Sassafrass; Cardstock: Bazzill; Flower Embellishments: Basic Grey; Twine: Divine Twine; Brad: Stampin Up; Journaling font: Vintage Typewriter; Ink: Tim Holtz Distress Ink; Misc: embroidery floss, buttons.
To create the hat, I used
Cricut Craft Room.
First off, I used the little top hat from
Paper Doll Dress Up
I then used the tools to stretch the hat vertically.
Then I used the corner tool to angle the hat.
Finally, I simply cut out the whole hat in both white and red. I used the white hat for the base and cut the red hat into strips by hand and glued every second red strip on to the white hat. I added black marker details to finish it off!
To create the "Read to Me" title for the page I combined a few different cartridges in
Cricut Craft Room.
To begin with I used the tag from
Birthday Bash.
To make the tag look more like a ticket, I made tiny little circles with
George and Basic Shapes and lined them up along the side of the tag so that it would make little half circle cutouts.
I used the word [read] from
Graphically Speaking and the words "to me" are from the font on the
Robotz cartridge.
I moved the words around until they were close enough to weld them and then cut it all out.
To create the ball I used
B is for Boy. Normally the ball comes with an elephant on top of it but I used CCR to get the ball to the size I wanted, and then just cut the elephant off the top by hand after I had used the Cricut to cut out my shape.
To make the fish bowl, I again used
B is for Boy. Normally when you cut out the water it fills up the whole bowl, I simply cut the water level by hand to make it look like it was tipped.
To finish off my layout I added some flower embellishments and did some topsy turvy journaling down the side.
I just wanted to show a close up of the background paper. It has little letters all over it and I thought it was a great little detail and went great with the challenge
I hope this helps you if you decide you would like to try to recreate some or all of the elements on this page.
I'd love to see your Dr. Seuss inspired projects too! Link up your projects on the
Cooking with Cricut website.
I'm looking forward to sharing more of my creations with you at
Cooking with Cricut!
~Becky


What a FANTASTIC project Becky! I love all the detail pictures explaining how you made the cuts! Thank you so much for sharing and joining the CWC team!
ReplyDeleteMelin
Blog: CookingWithCricut.com
Shop: PaperCraftingWorld.com
Love this LO, Becky! All of the little details make this such a precious way to capture a wonderful memory! Welcome to the CWC team.
ReplyDelete~ Jen
WOW Becky! So much detail went into this!! I am somewhat layout-challenged, so my jaw is on the floor. :) Thanks for the Cricut Craft Room Tutorial too - I've not used it yet, but I'm thinking perhaps I may try it out this afternoon... Welcome to the CWC team! :)
ReplyDeleteNita
Wow is right!!! I'm totally impressed with your talent!! I love the idea of stretching the hat - I never would have thought of that!! :-) Love what you did with the ticket too! The Cricut Craft Room is so awesome!! BTW, your layout is simply adorable!! There is nothing like reading to a child!!
ReplyDeleteThanks for sharing how you used Cricut Craft room to do your project. It came out so very very cute. Love the picture of your two kids reading together. So happy to be designing with you at CWC.
ReplyDeleteThanks for the instructions for the CCR. I have been trying to figure out how to use it for months now, still with no luck. lol
ReplyDeleteGreat layout and such cute photos. Glad to be on the DT with you.
I love your page! The topsy turvy elements are so cool!! I love all the details that went into this page! GREAT JOB!!
ReplyDeleteI love the tutorial and the layout, thank you so much for sharing both. I look forward to creating with you with CWC Design Team!!
ReplyDeleteWendy
What a sweet sister (and layout)! Thanks for the tutorial, love how you altered the hat! Congrats on the DT, I look forward to creating with you.
ReplyDelete-Hattie
hattieshaven.blogspot.com
Beautiful stuff. And thanks for the comments on my blog :)
ReplyDelete